|
AKOS
v1.0.0
Documentation
|
|
AKOS
v1.0.0
Documentation
|
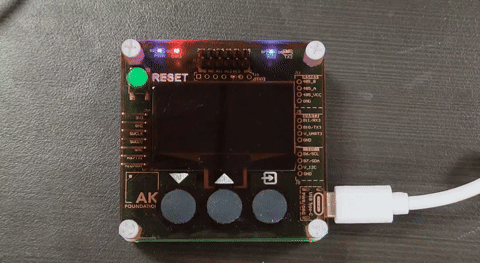
This page uses the AK Embedded Base Kit for STM32L151 as the reference board.
That board is the best place to begin because it already matches the AKOS target family, it ships with a board-specific boot/application memory map, and it exposes a simple path for loading application firmware over USB.
The board README describes it as an evaluation kit for embedded learners. The main features called out there are:
For AKOS documentation purposes, the most important part is that the kit is already organized around a bootloader plus application split, which makes it a good reference for how to place an RTOS application in flash.
The board repository documents this memory map:
That means an AKOS application for this board should not assume it starts at the beginning of flash. The linker script and any flash programming workflow need to respect the application start address at 0x08003000.
If you are bringing AKOS up on this board, the practical setup is:
Typical setup commands look like this:
The current AKOS blink example already shows the STM32L151 toolchain shape:
Those files are the right place to adapt pin mapping, clock setup, and the flash offset needed for this board.
For a first pass, the normal workflow is:
If you are targeting the AK Embedded Base Kit specifically, update the board configuration so the final image is linked for the application region rather than the boot region.
The board README notes that once the boot and application images are loaded, you can use AK - Flash to program the application directly over the USB port.
That makes the board useful in two stages:
For AKOS development, the second path is the one you will use most often.
When you port the example to this board, start with these items:
After the board is configured correctly, the example should build and run on the AK Embedded Base Kit with the expected LED activity.
Once the board boots and the application image flashes correctly, continue to:
From there you can start turning the board's buttons, display, and buzzer into actual AKOS tasks and events.